

Tips For Making Homemade Bread
Northshoredish.com– Tips For Making Homemade Bread. Making bread at home is more than just cooking; it’s an art and a science that fills your home with the calming smell of freshly baked bread. Getting good at making bread can be very satisfying, no matter how experienced you are as a cook. Here are some important tips that will help you make the best loaf.
Picking Out the Right Ingredients
What Different Types of Flour Mean
What kind of flour you use has a big impact on the taste and feel of your bread. Because it has more protein, bread flour helps the gluten grow better, which makes the structure chewier. For most recipes, all-purpose flour works fine. But if you want a thicker loaf, try whole wheat or rye flour.
What Yeast Does
The magic ingredient that makes your bread rise is yeast. People often use active dry yeast and quick yeast, but fresh yeast can also be used. Remember that yeast needs the right conditions to grow. Some sugar and warm water can help the process get going.
Why water quality is important
Water may not seem like a big deal, but the quality of it can affect how your bread turns out. If you can, use filtered water because chlorine and other chemicals in tap water can stop yeast from working.
Figuring Out the Levels of Dough Hydration
How much water is in your dough is very important. This is called “hydration.” Doughs with a higher hydration level (more water) are usually smoother and have a more open crumb, while doughs with a lower hydration level (less water) are denser. You can get different colors by changing the amount of water in the material.
Different Ways to Knead
By kneading, you build up the gluten network, which gives your bread its shape. You can use a stand machine or knead the dough by hand. Make sure the dough gets smooth and stretchy either way. Put a small piece of dough between your fingers and stretch it out. It should get thin without breaking. This is a good test.
Resting Times
The dough can rise and get better flavors while it rests, also called “proofing.” Watch out for this. The first rise is for the dough to get bigger, and the second rise is after the dough has been shaped.
Things You Need: Important Baking Tools
Mixing bowls should be big and strong.
When measuring cups and spoons, accuracy is very important.
Digital scale: To get exact readings.
Depending on the kind of bread, a baking sheet or a loaf pan.
Nice-to-Have Tech
Stand mixer: It makes it easier to knead.
Dough scraper: For working with dough that is sticky.
Proofing Basket (Banneton): This helps shape the dough and keeps it steady during the last rise.
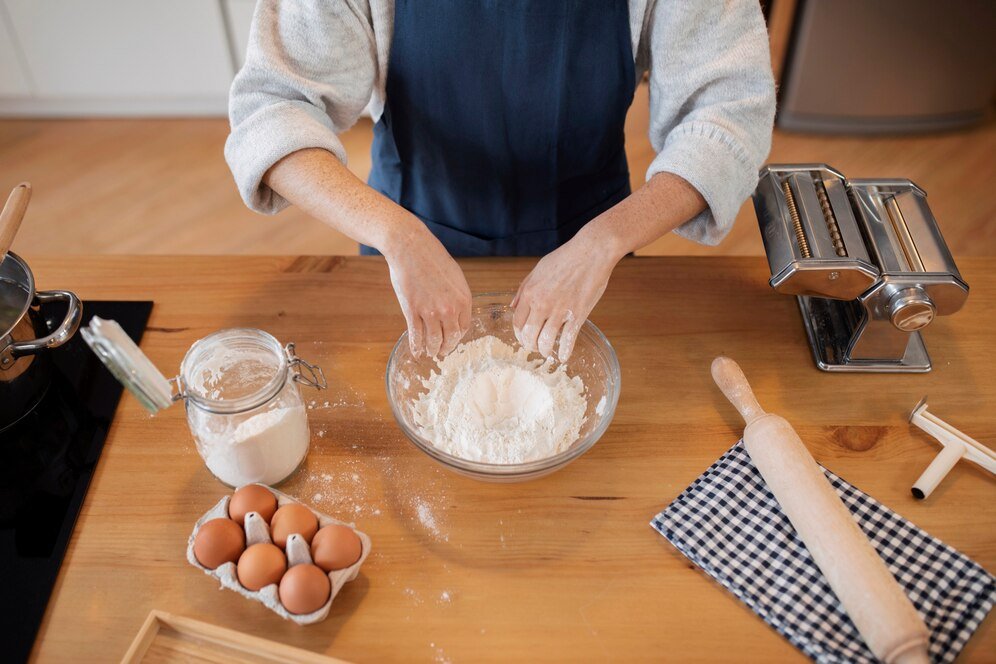
How the Mixing Works
How to Mix Things Right
Mix the dry ingredients first, then add the wet ingredients little by little. Stir until everything is well mixed in. When the dough comes together, it’s time to knead it. If you mix it too much, the bread will be tough.
Mistakes People Make to Avoid Having Too Much Flour: When you mix the dough, don’t add too much flour; it can make it tough.
Choosing Not to Hydrate: Watch how the dough feels and add or take away water as needed.
The First Rise
Best Conditions for Rising
It should be between 75°F and 80°F for the first rise. Lay the dough out on a wet cloth or piece of plastic wrap and let it rise until it grows twice as big. Most of the time, this takes one to two hours.
How to Tell If It’s Ready
Push the dough together a little with your finger. If the hole slowly pops back, it’s ready for the next step.
Making the Shapes: How to Make the Different Shapes
It’s an art to shape dough into everything from traditional cakes to rolls and baguettes. Flatten the dough out slowly, then make it into the shape you want and put it in a baking pan or on a sheet.
How to Take Care of Dough
If you don’t want to stick, work on a lightly floured area. To get a light, airy crumb, handle the dough gently so that the air bubbles stay in place.
The Second Rise
Why the Second Rise Is Important
The second rise, also called “proofing,” is very important for making the texture and taste develop. Most of the time, it takes thirty minutes to an hour. Proper proofing keeps loaves from being thick and flat.
How to Get the Best Out of It
Put the shaped dough somewhere warm that doesn’t get cold drafty. A loaf pan that has been lightly greased or a proving basket can help the bread keep its shape.
Making bread
Getting the Oven Ready: Preheat your oven to the temperature that your recipe calls for, which is usually between 375°F and 475°F. A hot oven will give the bread a good rise and a crunchy top.
How long and how hot to bake
Follow your recipe when you bake. Bread is done when it hits a temperature of 190°F to 210°F on the inside.
Making sure it’s done
If you tap the loaf on the bottom, it should sound flat. Check the temperature inside if you have a thermometer.
How to Cool and Store Bread Correct Ways to Cool
To keep the bread from getting soggy, let it cool on a wire rack. The crumb will set properly after it cools.
The best ways to store bread to keep it fresh
At room temperature, keep bread in a bread box or a paper bag. Freeze slices in a ziplock bag to keep them fresh for longer.
Common Issues and How to Fix Them
How to Fix Common Problems
Dense bread: This could be because you didn’t knead it enough or let it rise long enough.
Overproofing or weak yeast can cause a flat loaf.
Cracked Crust: The bread’s temperature changes quickly or it’s not scored.
Advice on How to Get Better
Change the way you do things based on these usual problems. Getting better over time!
Adding Tastes and Changes
Putting herbs and spices in
To make it smell better, add rosemary or thyme, either fresh or dried. Warmth can be added with spices like cinnamon and nutmeg.
Putting in Fruits, Nuts, and Seeds
Add nuts (walnuts, almonds), seeds (sunflower, pumpkin), or both for structure. You can make something sweeter by adding dried fruits like cranberries or raisins.
Making gluten-free bread: What Makes the Ingredients Different?
Different flours, like almond, rice, or sorghum flour, are needed to make gluten-free bread. Xanthan gum or psyllium husk are often added to make the bread stretchy like gluten bread.
How to Make Good Gluten-Free Bread: Gluten-free doughs are often thicker and more like batter. Let them rise somewhere warm and damp so they don’t dry out.
Choices for healthy bread
Bread with whole grains and a mix of grains
For more fiber and nutrients, use whole wheat, spelt, or multigrain flour. They might be thicker, but they’re better for you.
Cutting back on salt and sugar
You can change the amounts of sugar and salt in your recipes to fit your diet without changing the taste.
In conclusion
It takes patience, skill, and a strong desire to make your own bread. As you bake more loaves, they get better and better. So get your items together, enjoy the process, and feel good about yourself while you bake your own bread.